Monson's Advance and Retreat

|
See our interactive map of Monson's Advance and Retreat locations and routes on Google Maps | |
|---|---|---|
Summary
General Lord Lake wanted to contain the forces of Jeshwant Rao Holkar in Malwa and ordered Lt-Colonel William Monson with five battalions of native troops to guard the Bundi and Lasheri passes. Encouraged by local support at Kotah, Monson advanced further south extending his lines of communication and supply. He was hoping to meet up with Colonel Murray moving north with a force from General Wellesley's army. Unable to make contact with Murray and realising the threat from Holkar's forces, Monson decided to retreat. He was harried all the way back to Kotah, lost considerable numbers of men and much baggage at the Mej and Bunaas River crossings, and finally straggled back to Agra a defeated rabble. Of the more than 10,000 in Monson's original force, only a few hundred survived.
Monson's Field Force
1st Umballa Brigade
Brig Halifax, 75th Queen's Regiment
- 75th Queen's Regiment
- 1st Bengal Europeans
- One troop of Horse Artillery
2nd Umballa Brigade
Brig Jones, 60th Royal Rifles
- One wing of 60th Royal Rifles
- Two squadrons of 9th Lancers
- One squadron of 4th Bengal Lancers
- One Troop of Horse Artillery
Meerut Brigade
Brig A Wilson, Royal Artillery
- One wing of 60th Royal Rifles
- Two squadrons of Carabineers
- One Field Battery
- One troop of Horse Artillery
- Native Sappers
- 120 Siege Artillerymen
External Links
The Delhi Campaign Article by Maj Agha Humayun Amin
1st Bengal European Fusiliers in the Delhi Campaign Google Books
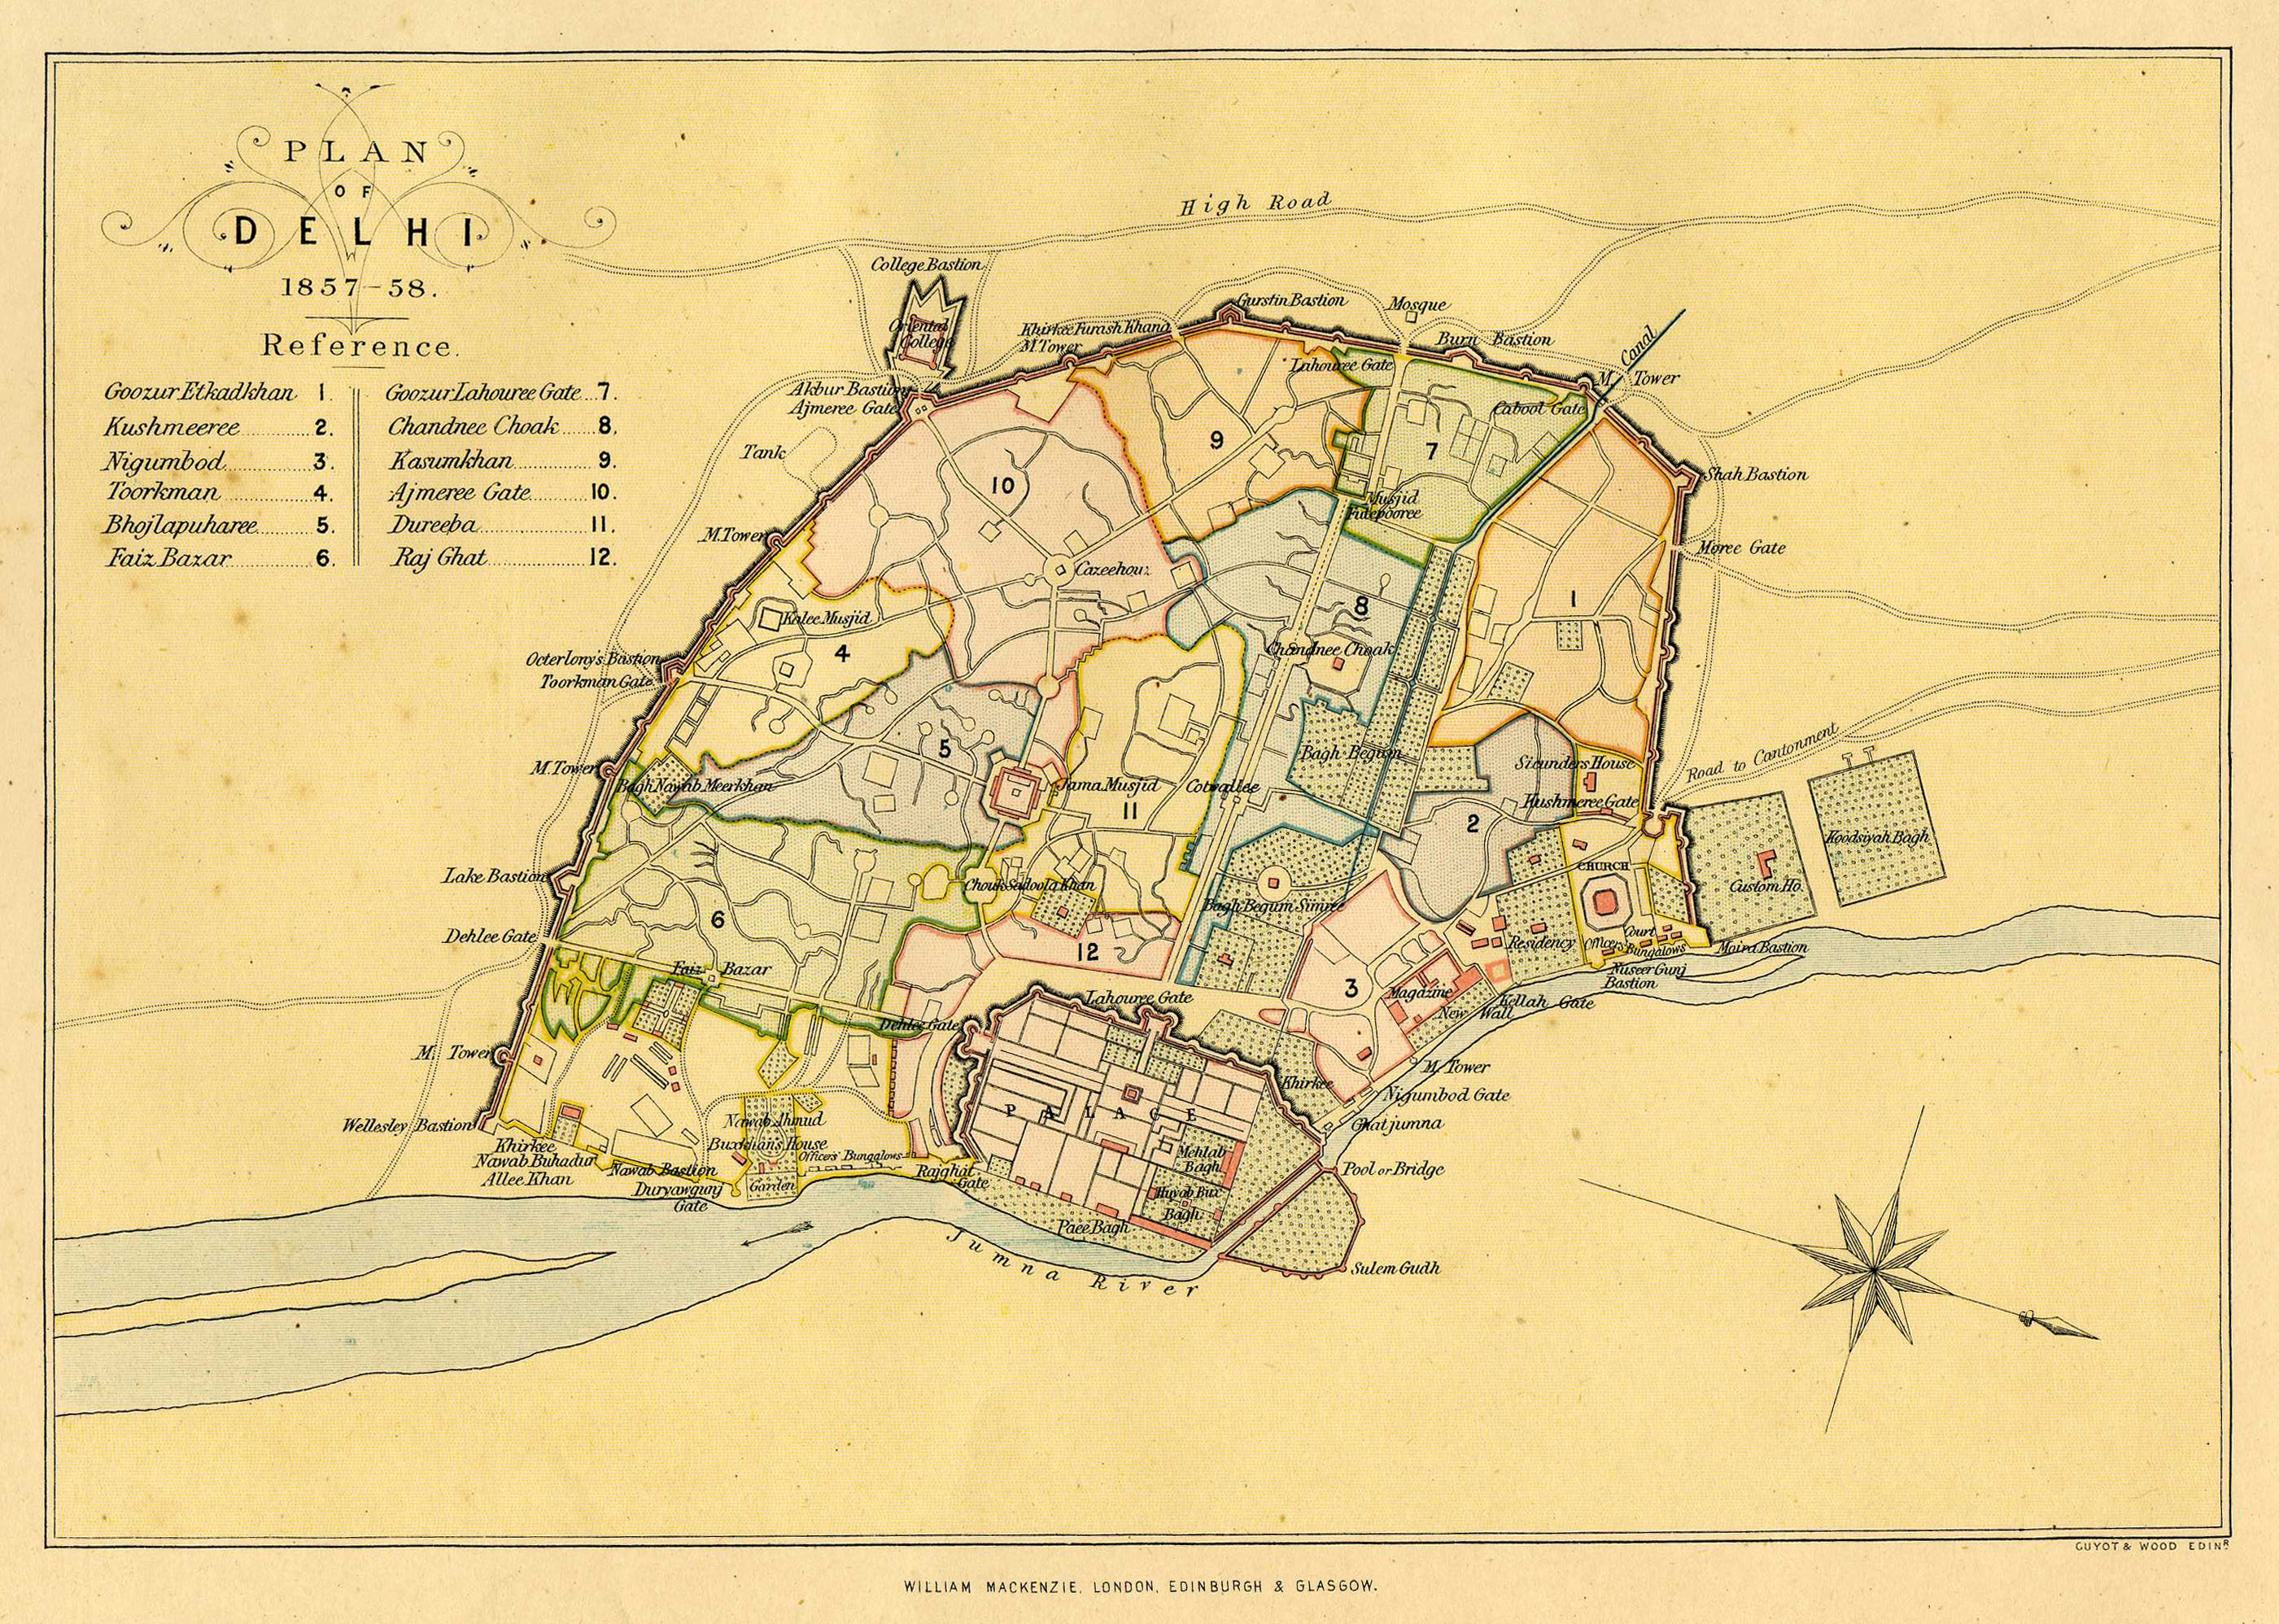
Map of Delhi 1857-58 www.columbia.edu
Siege of Delhi Google Books